Acrylic Pour Art
As always, I’ve got at least four projects at the working stage.
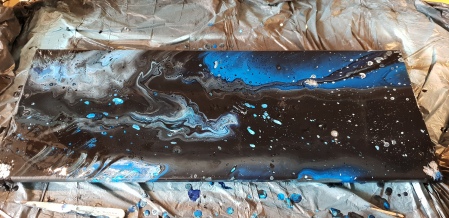
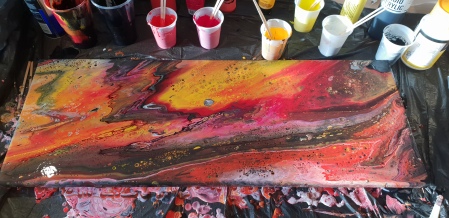
Here are a couple of pics of my acrylic pours so far.
I love them.
It’s so easy to get good results with a little research. On top of any videos that you might watch, I’ll add a couple of pointers that took me a while to find.
– Acrylic pouring requires that you water any paints down so that they drip of your mixing sticks like slightly diluted cream. You can use an acrylic flow medium *or* just PVA glue to save you money. Doing this cheaply is great, and doesn’t undervalue your time or skill.
– Cheap acrylic paints are fine, just be sure to mix them well. Use flow medium or PVA glue, with tape water to get the desired cream-drip. It might take time to mix things properly, but it’s worth it in the end.
– Silicone is advised as a means to get the cells you see in acrylic pour art. You can go online and buy some ‘Treadmill oil’ silicone, but what serves equally as well is a couple of squirts of WD40, which a lot of people will just have in their cupboard. Spray it into the cup holding each colour and mix it in well.
– People use heat guns, or paint stripping guns to get the cells to form; moving the gun quickly to prevent the paint burning or hardening…. but you can also just use a lighter, waving it above your canvass at a much less greater cost.
– Unless you’re doing this with resin, when you heat blast areas, you can get visual lumps in the surface of your paint. This doesn’t matter. The paint will just dry up, losing a significant amount of water. As it dries, it will appear to lose some of its saturation; strong, dark colours will appear to fade, but don’t get disheartened!
– Once your work has dried, spray it with a satin varnish, and everything will come back to life!
Acrylics always dry darker than they appear when wet, so the above tip will help you see your work in a new, invigorated life!

Leave a comment