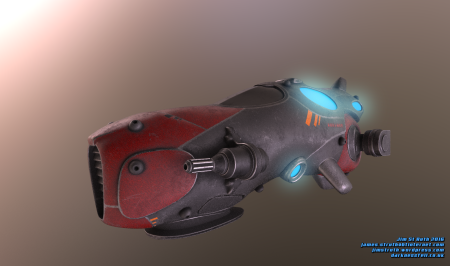
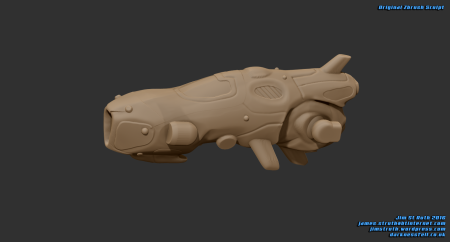
It’s been a long while since I posted to my blog… Busy world, lots of distractions and a lot of home improvement.
I bought Substance Painter a few months ago, and have been blown away by the ease of texturing a model. With so many filters, so much control and a great ability to customise, paint and make a model worn/ dirty, it’s an exceptional piece of software.
The model was sculpted in ZBrush, then retopologised and UV mapped in Maya.
To allow for high resolution textures, there are nine different texture sets/ UV groups, each with their own materials assigned, set up as different objects. The component objects are then unified into a single object that now has multiple texture sets, and it’s exported as an .obj file; importing this into Substance Painter then allows for the different texture sets to be worked on. I’ve included a UV snapshot of three of these texture sets below for reference and, whilst one of them doesn’t fill up the space as efficiently as it might do, it did the job.
The modelling took far more time than the texturing. Completing the ZBrush sculpt was pretty rapid, and I was happy with the overall design. This was created via Dynamesh and then reduced from 5m polygons to 36k using Decimation Master. The model was then made live in Maya, curves drawn across the surface which were then smoothed to make the flow of the individual piece of the model in the next step more regular.
The retopology was then completed at a low resolution; only around 25k polygons for the whole ship. The borders of the model’s pieces were checked with smooth preview, before the next step in Maya.
Substance Painter doesn’t have an option for smooth preview, so to prevent any blockiness the objects need to be at a higher resolution. So the pieces were subdivided, and unwanted edges were deleted. The final object is around 100k polygons which, when imported into Substance Painter, made my machine run like a dog.
However, because I’d UV mapped in groups and created several texture sets, the various pieces can be viewed and worked on in isolation in Substance Painter, speeding things up considerably. It’s also worth pointing out that by cycling through the material options with the ‘m’ shortcut key, you can effectively turn lighting and shadows off, allowing the whole object to be visible with very little slow down.
I was going to take everything back into Maya to render… but the in-built renderer in Substance Painter does a very nice job using HDRI maps for lighting. Since this is just a static image, just some beauty shots of the model and no scenery or posing, I’m just going to leave it as it is.


