For an upcoming something…

??? … Click to enbiggen…
This will be one of my next physical sculpts in Monster Clay… but the reason shall remain a mystery, perhaps for some time…
For an upcoming something…
??? … Click to enbiggen…
This will be one of my next physical sculpts in Monster Clay… but the reason shall remain a mystery, perhaps for some time…
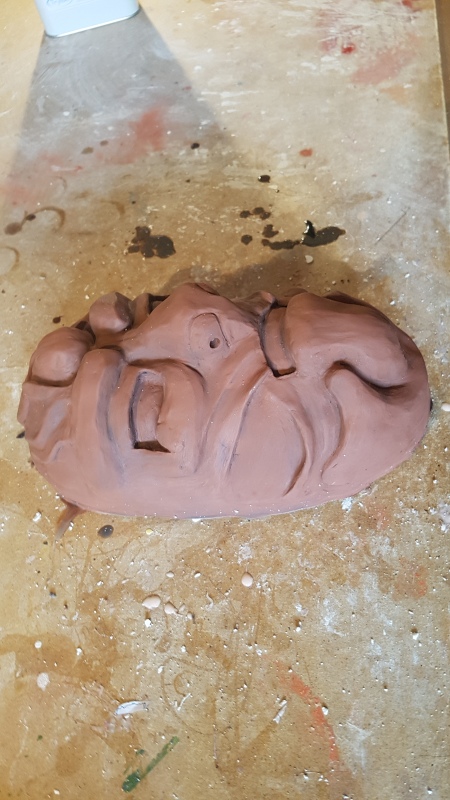
I’m really proud of this.
It’s been a work in progress for a couple of months, but I finished the paint job today!
Note: As when using all powders or chemicals that might get onto the skin, in the eyes or lungs, please use adequate precautions! Look at product data safety sheets (easily found on the net) for anything that you use, familiarising yourself with any risks!


Step One – Sculpting
The piece was moulded in Monster Clay on a full-face life cast of my own noggin. The details were then smoothed out with small amounts of white spirit/ mineral spirits using two small, cheap paint brushes; one very course, and the other a fine sable brush, both bought from the 85p paint brush bin at Fred Aldous in Manchester. I made sure not to make the surface too smooth, so that there’s some variation in the fine detail; I wanted it to look a little rough when it was done.
Partially-sculpted Monster Clay on Plaster of Paris face cast
Note: if you want to get Monster Clay really smooth, then using the end of a dish cloth that’s been dabbed in white spirit can help a great deal, but you might need to make the sculpt pretty smooth first with a sculpting tool, to save you time later on.
Note: If you do this, you’ll need to make sure that the white spirit evaporates before taking the next step. White spirit can, if you use it in any volume, turn Monster Clay to complete mush, and you don’t want the moulding process to ruin any forms or detail. I’ve also no idea if, since the moulding is done in silicone rubber, whether this will prevent curing of the mould. I’ve never had a problem if I leave the white spirit to evaporate.
Note: You’ll need to use white spirit in a well-ventilated area. For me, this is just working with the window open and a fan on. Be cautious. Make sure that you can breathe fresh air!
Step Two – Moulding
I used Tinsil 80-15 to mould the piece, applying a relatively thin detail-capturing layer first. The ’15’ in Tinsil 80-15 relates to its shore hardness, with ‘0’ being the most soft and therefore the most flexible.
Tinsil is very runny, and pretty viscous. Applying in thin layers and letting it cure in between applications means that the rubber won’t just run off all over your work surface (and onto the floor). This method gives you a dome-like mould, which saves rubber too.
Note: You can create a box mould, which means you can just pour the rubber over the piece in one go. This does use more rubber, however, and you can quickly find yourself using a full £35 tin up in one go.
The ‘dome’ method used less than half of that, built up into an overall thickness of around 1.5cm. I left it a full 24 hours to cure, then built up a support jacket make of modroc, to keep the rubber relatively well-held when the final casting took place. This only took around half an hour to be dry.
Step Three- Casting
First, I shook some sintered copper powder into the silicone mould, brushing it around with a cheap make up brush from Poundland. I made sure every bit of the mould’s interior surface was covered, then shaking the rest off back into its bag.
Note: You’ll want to use a decorator’s dust mask for this step, so that you don’t end up breathing in the copper powder.
I used Quickcast resin from Trylon, with a black casting pigment, applied in several layers. The working time was around five minutes on a warm summer’s day in north-west England, and this may vary depending on the temperature and humidity where you live.
Only a small amount of pigment was used, well-stirred into the resin after parts A & B had been mixed. I then just slush cast it into the mould, trying to make sure there were no air bubbles, and that every part of the mould’s interior surface was covered.
This step was then repeated, building up the layers of resin. The final piece is only about 2.5mm thick around the edges, but much thicker around the details of the eyes, chin and nose. This stops it cracking when pulling the piece from the mould. I stopped slushing the resin around when it began to cure, turning into a tar-like substance.
The resin doesn’t take long to cure. It’s a heat-accelerated reaction, so the thickest areas of resin will cure first. It’s strong, but you might find the edges can be brittle. Just de-mould with caution, and you should be fine. I let the piece rest for half an hour after my final layer, just to be sure it ha cured before de-moulding.
Step Four: De-Moulding
Just do this with caution, after removing the plaster support jacket from the silicone. You should be able to just peel the mould off, but be cautious around any sharp or fine edges on the resin; using a low shore hardness rubber for the mould really helps.
De-moulded resin cast piece. The sintered copper powder is dull, and looks almost the same as the Monster Clay
Step Five: Buffing
The sintered copper powder is only a thin surface coat to the resin, and looks very dull and non-metallic after de-moulding. I polished the piece with some very fine grade steel wool, being careful not to scratch any of the sintered copper away. This leaves it looking pretty good. Using the back of a metal teaspoon on highlight areas can really help.
I then attempted to polish with Brasso… and this was not a good move. The fine pits and streaks in the mask allowed for the Brasso residue to build up, and no amount of research could give me a good solution for completely removing it. More Brasso just made it worst. With hindsight, I should have just then buffed with the buffing pads of my Dremel and an old sock, but I didn’t…
This did, however, make me go off and think… and that produced the final step: painting!
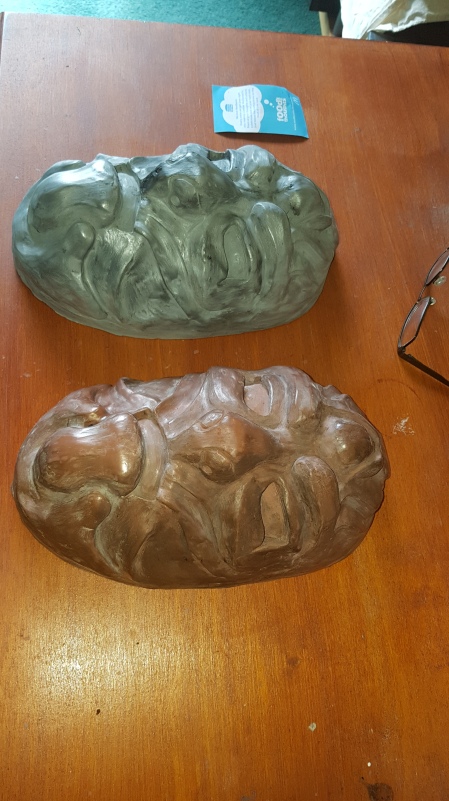
Buffed-up piece, with an second cast with sintered aluminium for reference. You can clearly see the unwanted Brasso residue.
Step Six: Painting
I bought some metal, Humbrol enamel paints, and some more cheap, wide paint brushes. After mixing the paint in their small tins, I dipped a brush in, wiping off most of the paint onto a clean sheet of paper.
This left a very small amount of paint on the brush, which I then used to paint highlights.
Et voila!

Final, Painted Piece
This might be a long-term project to sculpt and mould into a silicone mask. I guess that the accessories would be made in resin, perhaps with a sintered mental finish that I can polish up. I’ve got another project to finish first, however, and I want to pull more of my focus back to writing.
So, I might never actually make it… but as a mask, I think it would be awesome!
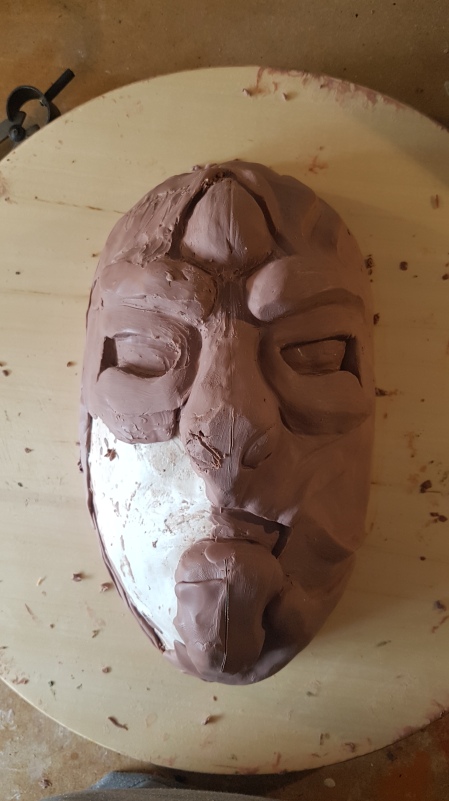
My latest monster mask sculpt!
As usual, this was sculpted in Monster Clay on a Plaster of Paris life cast of my head.
The ring of clar around the edges of the sculpt is flashing and a wall, behind which I’ll build another wall made of water-based clay, before making the mould with plaster.
The cuts with the short slashes across them will be stitched with string once the mask is cast and painted; they’ll be wound stitches.
I’ve got a little more refining to do, mostly clean up… but I’m happy with this for now.
Note On Final Detail:
To create a subtly bumpy surface, I took a makeup sponge and applied a little white spirit (mineral spirits in the US, I think). Then, dabbing all over the sculpt where I wanted this detail, the clay begins to soften, and I just kept going until the texture was right… and stopped before the clay got outright mushy.
If you try this for the first time, be aware that a makeup sponge can hold a lot of white spirit. It’ll easily run down the model, which might not be a problem… but slight glances with the back of your hand can smear previously-created detail. Caution is the watchword.
