Archive for monster clay

Resin Helmet: Part One

Posted in 3D, casting, Design, General, Pictures, sculpting, zbrush with tags , , , , , , on June 7, 2019 by Jim St Ruth

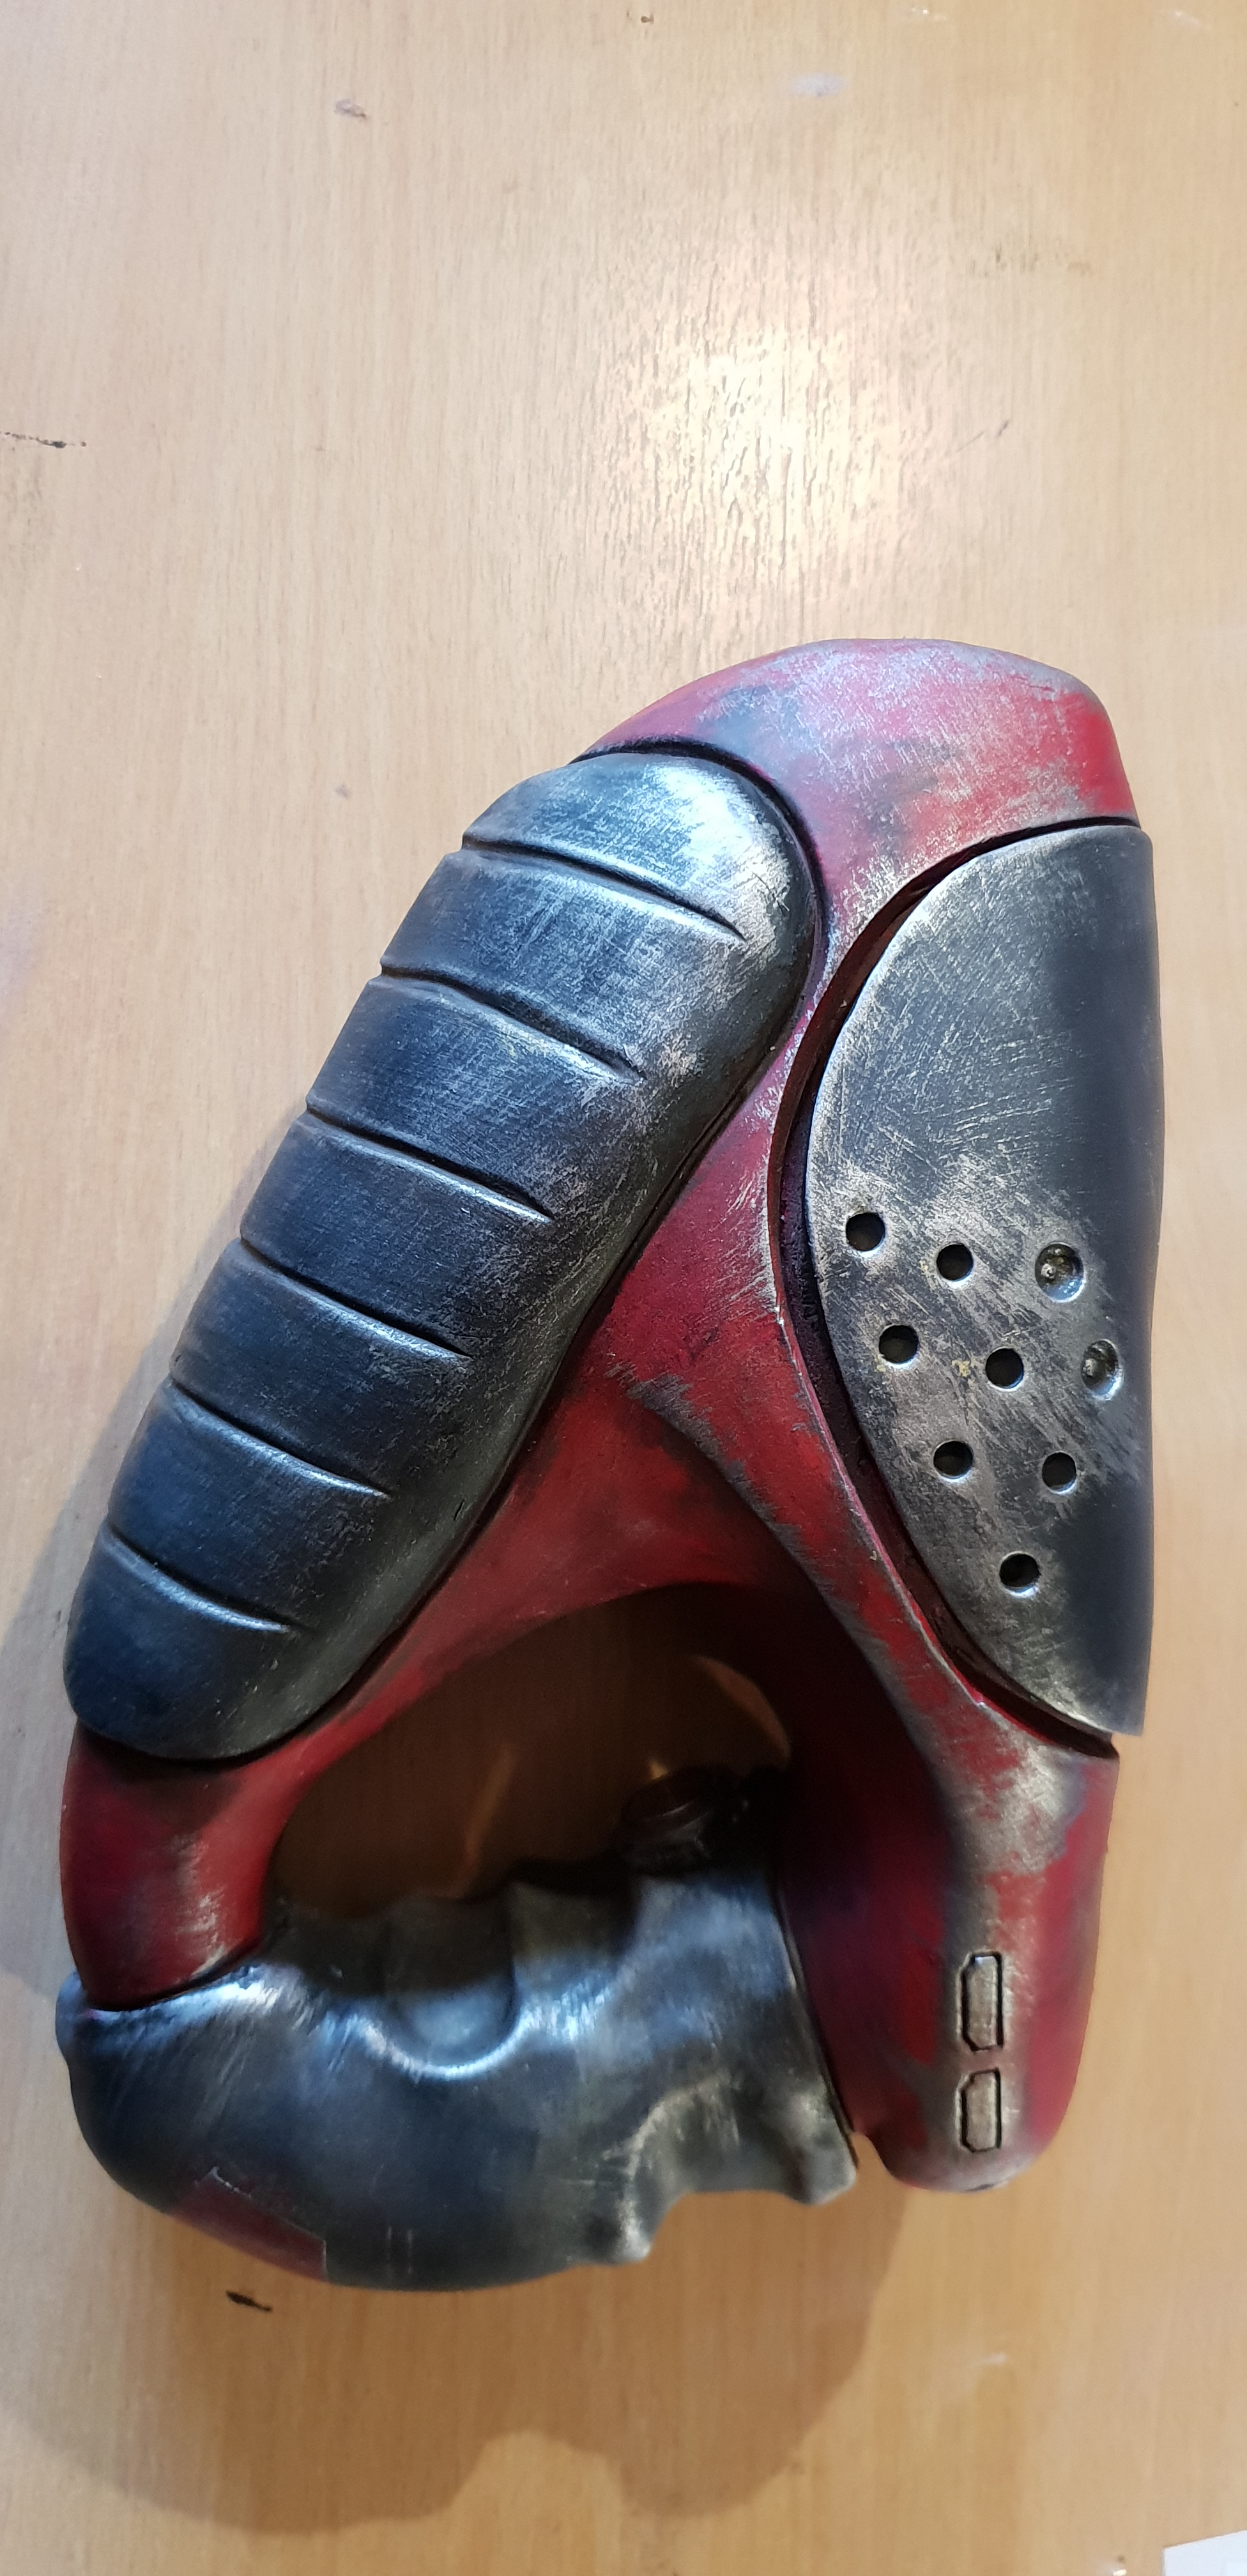
I needed some practice splitting a sculpt into several pieces, so that I can make sure I mould my Current Big Sculpt properly (The Mother in the post below)… so I decided to make a helmet!

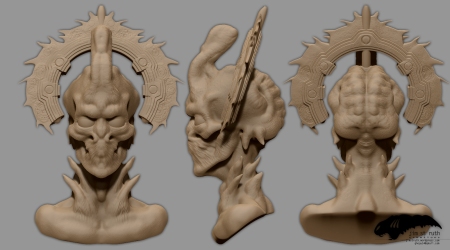
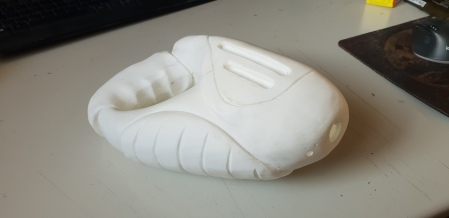
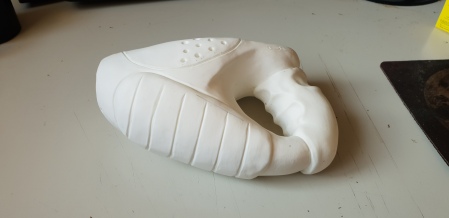
I’ve included a shot of the ZBrush concept, which I’ve then built on a plaster cast of my own noggin. This cast was wrapped in cling film and then duct tape to protect any clay (as the plaster cast is getting old and flaky, and I’m fed up of picking bits out of the clay when I reuse it!). I then started building the helmet in Monster Clay medium, getting the basic shape down.

After that, I cut off the face plate, which I’ve refined and is now almost ready for moulding. I’ll mould it in silicone with an two-part Easyflo 120 resin mother mould, then cast it in the same resin.

The face plate will then be stuck to the front of the rear piece of the helmet, which will be sculpted, then the face plate removed so that the rear piece can be mould and cast too.

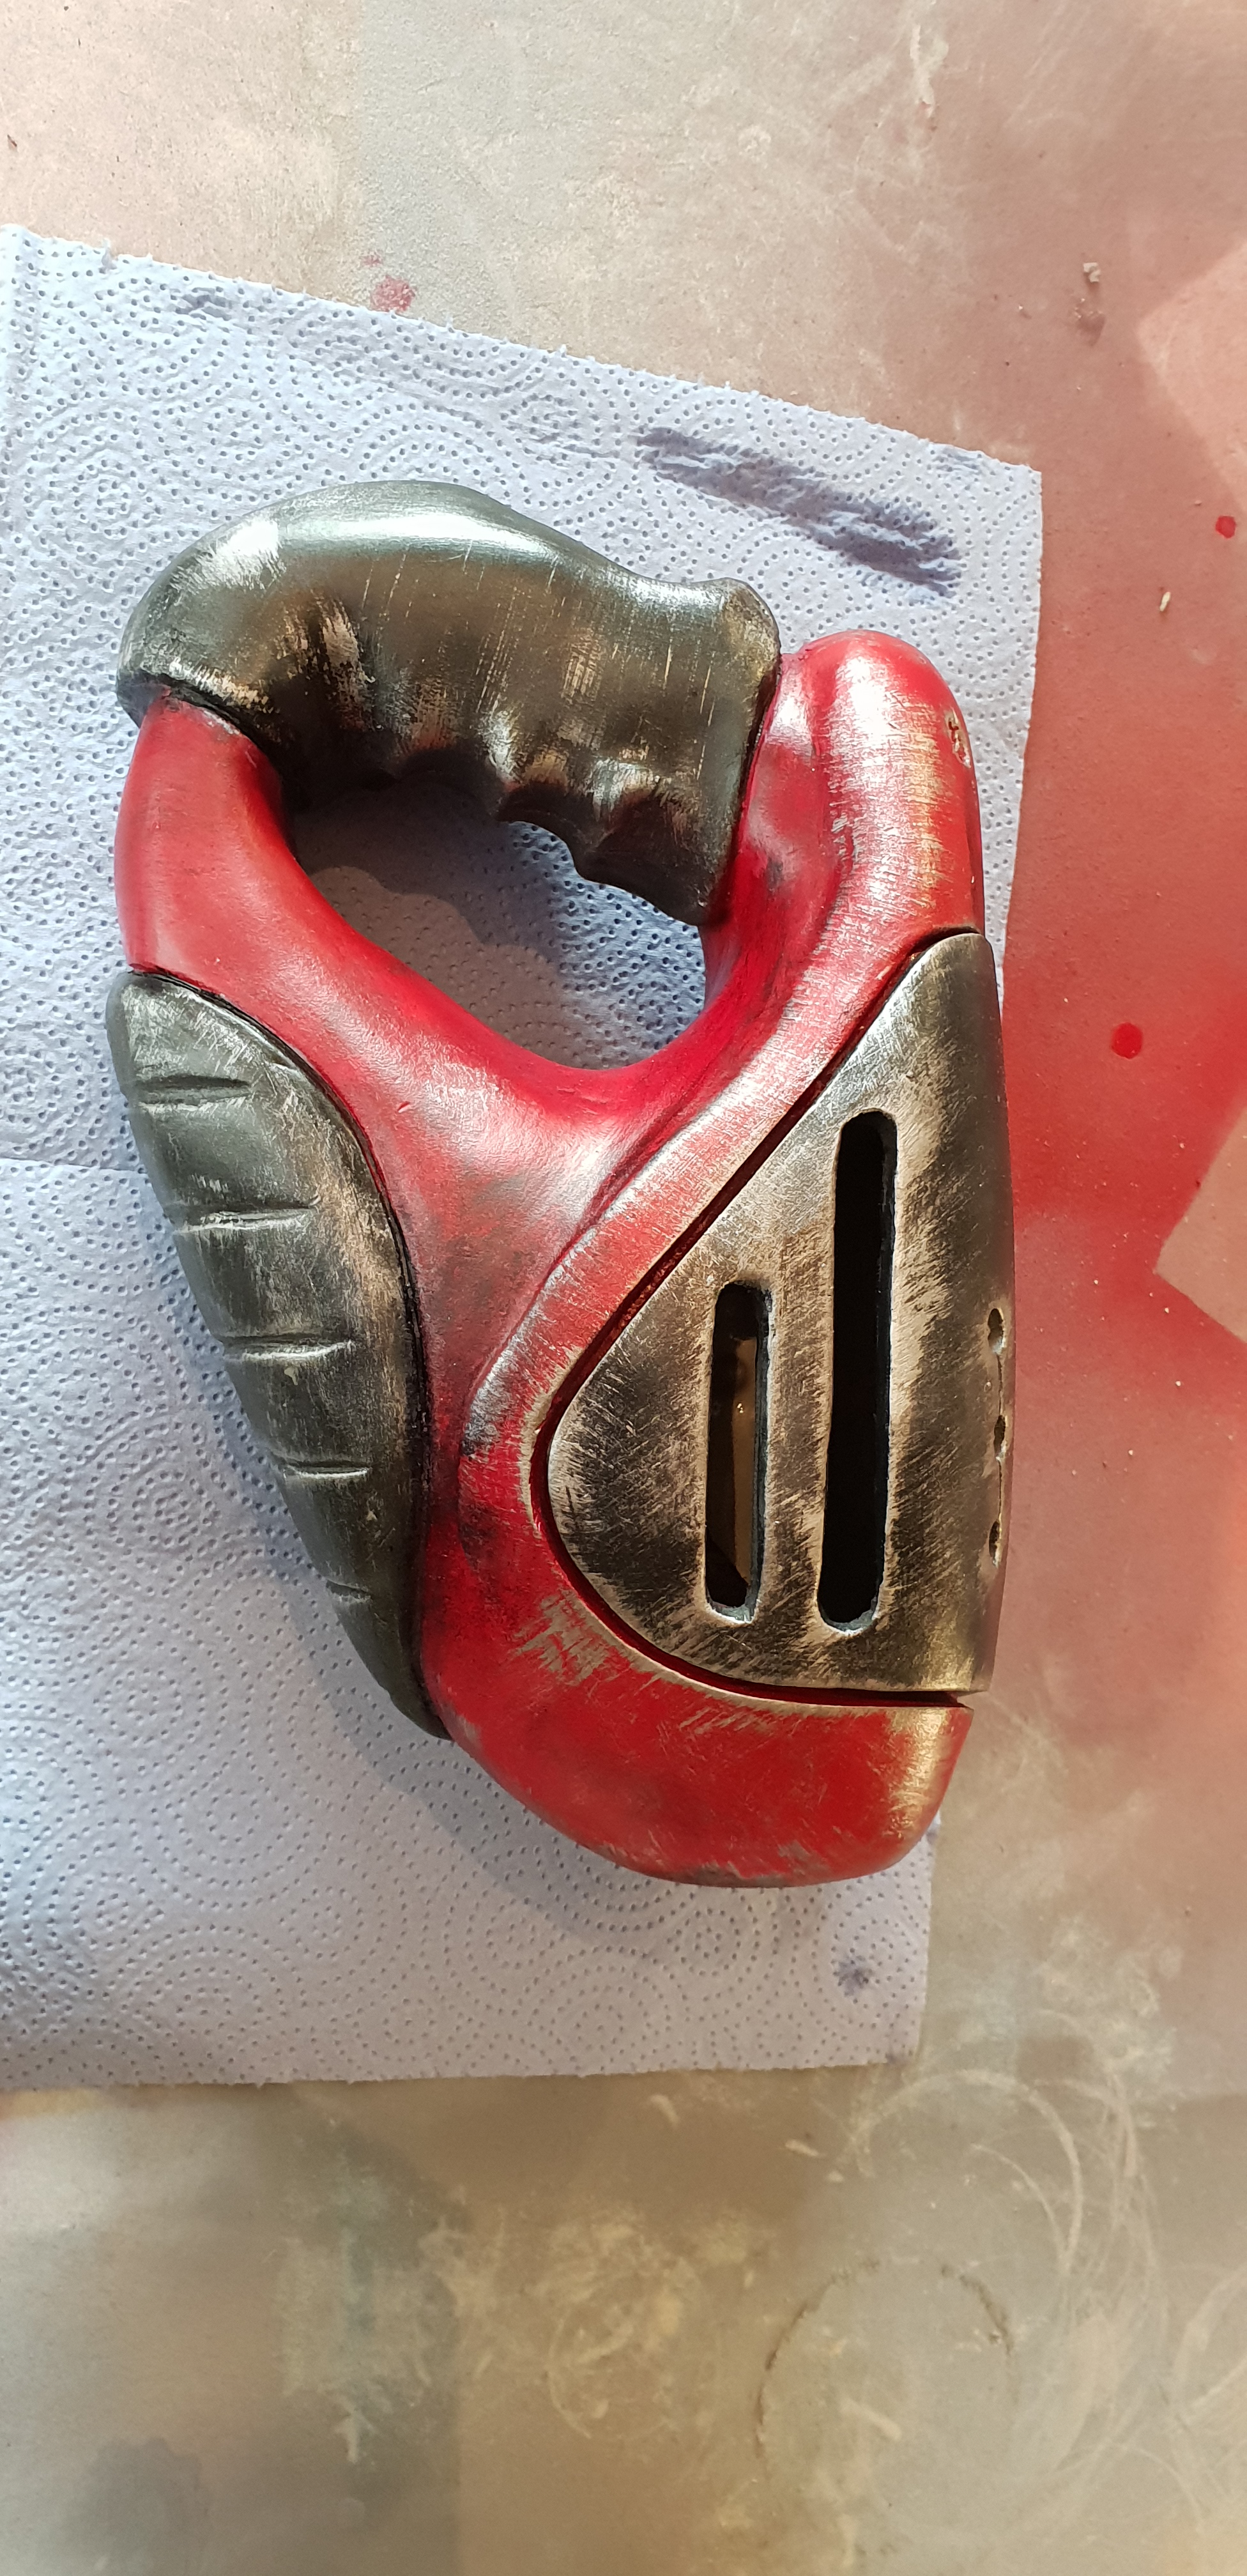
I’m planning on hohlding the two final cast pieces together with rare earth magnets, and it *may* have some lights. The two areas on the side of the head (on the rear piece) that are inset, I’ll cut out and place a dense wire mesh into. I’m *planning* on painting it as worn/ battle damaged, but it shouldn’t take too much work with some fine grit sandpaper to make it much smoother if I change my mind and want a more polished look.

Cheers,
Jim

The Mother: Sculpt WIP

Posted in Design, Fantasy, General, Horror, Pictures, science fiction, scifi, sculpting, Uncategorized with tags , , , , , , , , , , on April 30, 2019 by Jim St Ruth

This is my latest full-sized creature bust project which, as always will end up being mould and then cast in resin, painted and set up with glowing eyes. I’m really excited about this sculpt, and it’s coming together very nicely.

The concept was done in a couple of hours in ZBrush, which was then rendered in the front, side and rear views, sized up in Illustrator and then printed out for scale, and taped to a shelf at the rear of my work area so that I could work with full-sized references.

conceptWhole1

I then started work with a polystyrene foam base, and a core column made from the same material to provide stability and support, with the base in mind to use as a convenient surface to mould on when it’s ready. I knew this was going to get pretty heavy as I worked on it, so picking it up and shifting it around isn’t something that I want to do. For convenience sake, the base was set up a lazy Susan.

The bust sculpt was then built up in Monster Clay medium-grade, turning as I added clay, and then leaving to cool; building up a lot of Monster Clay in one go can sag when it’s still warm. After getting the general silhouette right (checked by shifting the lazy Susan in front of each of the printed references), I cut the end off a broom handle and set it into the top of the skull. This would be the mount for the halo crown.

I then took down the reference images, to allow myself the freedom to develop the piece without being tied down to the original concept. Some of the details changed; replacing the shoulder ‘tentacles’ with the masses pictured below at the front and back around the base of the neck.

After completing the overall forms, and doing some of the detailing, I tried out some skin textures, before moving onto the crown – the detail of the symmetry will come later on.

As this is going to have to be moulded in several distinct pieces, it was time to think about how the moulding would occur. The mould will be a two-part silicone mould, covering the left and right halves, with a two part resin mother mould for stability over the top. This means that the crown will have to be sculpted and moulded separately, in addition to the skull ‘tentacles’, two of which are set behind either ear hole. When the pieces are cast, I need to fit them all together and for the seams to be hidden in a natural manner… so that’s why I’ve started on the crown.

A sized template was printed and cut, then traced onto 5cm polystyrene foam. It was then cut out with a foam cutter, a hole cut into the center, and one end of the sawn-off broom handle slotted into place. The first pic shows the test fit, which is positioned higher than in the concept. She’s now 71cm high (!), the largest piece that I’ve worked on, and extremely imposing on the desk!

The halo was then removed, covered in clay, and I’ve started to lay out the forms. Again, I’ve changed the design into something that I think feels better. The final two shots are of the unfinished halo fitted into place so I can check the size, developing silhouette and overall feel.

This is going to cost a couple of hundred pounds to mould and cast, so I need to make sure that everything’s as perfect for moulding as it can be. When the sculpting is done, I’ll take my time with the mould, so I don’t waste the money. I need to get it right first time. Eventually, I’ll stick The Mother on Etsy as casts for sale, after my own cast is painted and wired up with her glowing eyes. I might add some more LEDs in the holes around the neck too, if the tests look good.

She’s beautiful and scary and, like the other ‘night light’ busts I’ve done, will look really creepy in our hallway. The sculpting work should be basically done this month, and I’ll mould and cast the crown, the two pairs of skull ‘tentacles’ too. Then I’ll fit these into the main bust and finish the sculpting there to get the seams right, before removing the cast pieces, moulding and casting the main body… though that might have to wait until June; so I can afford to mould such a large piece, and to give me time to check my thinking on how the moulding for the main part of the bust will actually pan out.

Thanks for looking!

Jim.

Reptoid Bob: Finished!

Posted in Design, General, Pictures, sculpting, Uncategorized with tags , , , , , , , on February 9, 2019 by Jim St Ruth

I finished working on Reptoid Bob today, so here are some pics of him with his eyes fitted, and a shot of my very basic wiring set up. He’s pictured next to Grey Bob. All my sculpts are called Bob, because Black Adder was onto something 😉

I’m really proud of this work, and really excited to share him!

Reptoid Bob: Cast and Painted

Posted in Design, General, Pictures, scifi, Uncategorized with tags , , , , , , , , , on February 8, 2019 by Jim St Ruth

I managed to finish moulding and casting my reptoid bust a few months ago, but it’s taken me a while to get a paint job that I like. ‘Reptoid Bob’ is a full sized, hollow resin cast bust at 41cm high x 21cm wide x 33cm deep (around 18x12x16ins), originally sculpted in Monster Clay, then glove moulded in Platsil Gel 25 with a two part Easyflo 120 resin mother mould/ mould support jacket. He was then cast in Easyflo 120, cleaned up with some dish soap, then primed with a general purpose white priming spray.

Here are some shots of his casting, with all of the flashing cleaned off.

His eyes are acrylic hemispheres, the sculpt and mould set up so that I could easily clean out the eye sockets without damaging the thin structure of the eye lids, and the hemispheres just easily slot into place without any glue.

I first sprayed him a light blue colour, planning to darken areas and add detail, but it just wasn’t working out for me. So, I then sprayed him cherry red, which gives the base colour that you can still predominantly see around the horns, spines and scales.

Other colours were then added by air brush in several layers, making sure that there was variation between each part of the piece: a brilliant orange, then light grey, dark grey and a deep indigo around the shaded areas, thicker, fleshier sections and where his skin rises up around the horns, spines and scales. The lower sections of each scale were lightly sprayed with the same indigo.

To finish off, I added a deep green all over, making sure that the other colours were still visible in some areas, adding a light garden green, with some white highlights on the skin, scales and on the tips of the horns.

He’s done, painting wise, now. He just needs spraying with a matt varnish, and the next major and final step is already underway.

I’ve filled the acrylic hemispheres with some untinted Platsil Gel 10, which cures a semi-transparent milky white. The hemispheres come in male-female pairs, so the female sections will be sprayed a matt black, with a hole in the back of each to allow an LED to be hot glued into place.

Then, with some wiring, a resistor and a 4xAA battery back wired up to a switch (which I’ll need to drill into the cast to fit), he’ll finally be done. He’ll have light-up eyes, either in white or red, and he’s going to look stunning!

Resin Prop Gun: Progress

Posted in General, Pictures, science fiction, scifi, sculpting, Uncategorized with tags , , , , , on February 1, 2019 by Jim St Ruth

I finally managed to finish the resin prop gun that I’ve been working on, and wanted to share it on here! It was a real labour of love that involved a pretty huge learning curve, because I’ve never done anything like this before. I wanted to turn the piece into a ‘working prop’, complete with lights, and that’s not something that I’ve ever done before. I’ve done some soldering, but not since I was twelve… I think my dad insisted that I go and help him with his projects in the garage rather when I was insisting that I wanted to help my mum in the kitchen. Looking back, I think my mum just needed some time free to cook Sunday lunch, and finally I can see what use that brief time soldering was!

So, here’s some pics of the ‘completed’ clay sculpt. It took a few hours to smooth everything down, using my usual cut-off chip brush, a soft small paint brush and a kitchen scouring pad/sponge, all with some white spirits/ mineral spirits… but only because I had to the spirits evaporate from one side before I could risk turning the piece over. I ended up making a few small changes before I was really finished; sorry for the lack of pics, but I was on a roll 🙂


For moulding the piece, I raised it up off my cutting mat on some old piece of soft EVA foam, so as to reduce the risk of the clay being damaged. I then built a base of water-based clay around the blaster, which came up to the halfway point with the gun lying on its side. The clay was smoothed out with a water-covered finger, a wet sponge, with the detail around the very edges of the piece made smooth and tight-fitting with a soft rubber sculpting tool. This was then surrounded by mould wall made from cut sections of A4 foam board, and the top half of this two-piece mould was filled in with silicone.

This was done in two layers; the first for detail, and the second thickened with some Polyfibre II so that I could ‘sculpt’ the silicone on in a half-jacket, which saves a lot of silicone compared to just filling the mould up to the top.

For a mother mould, I used just a couple of layers of Easyflo 120 resin; the first layers poured and then spread with a paint brush, and the second bulked out with more Polyfibre II, which saved resin and made it easier to adequately cover the curved and vertical surfaces.

The whole piece was then flipped over. the clay was cleaned out, and the moulding process repeated, using some silicone free mould release to stop the silicone from the first part of the mould sticking to that of the second.


After opening it all up and cleaning out the clay, it was then time for moulding. I poured some Easyflo 120 into each side of the mould, spreading it around with a paint brush. Once this had cured, I mixed up some more resin, poured it in one half of the mould, then closed the mould and sloshed the resin around. Feeling how the weight of the piece shifted as the resin moved, I tried to make sure that everything inside was covered evenly, making sure that the seems would be completely covered… and it worked!


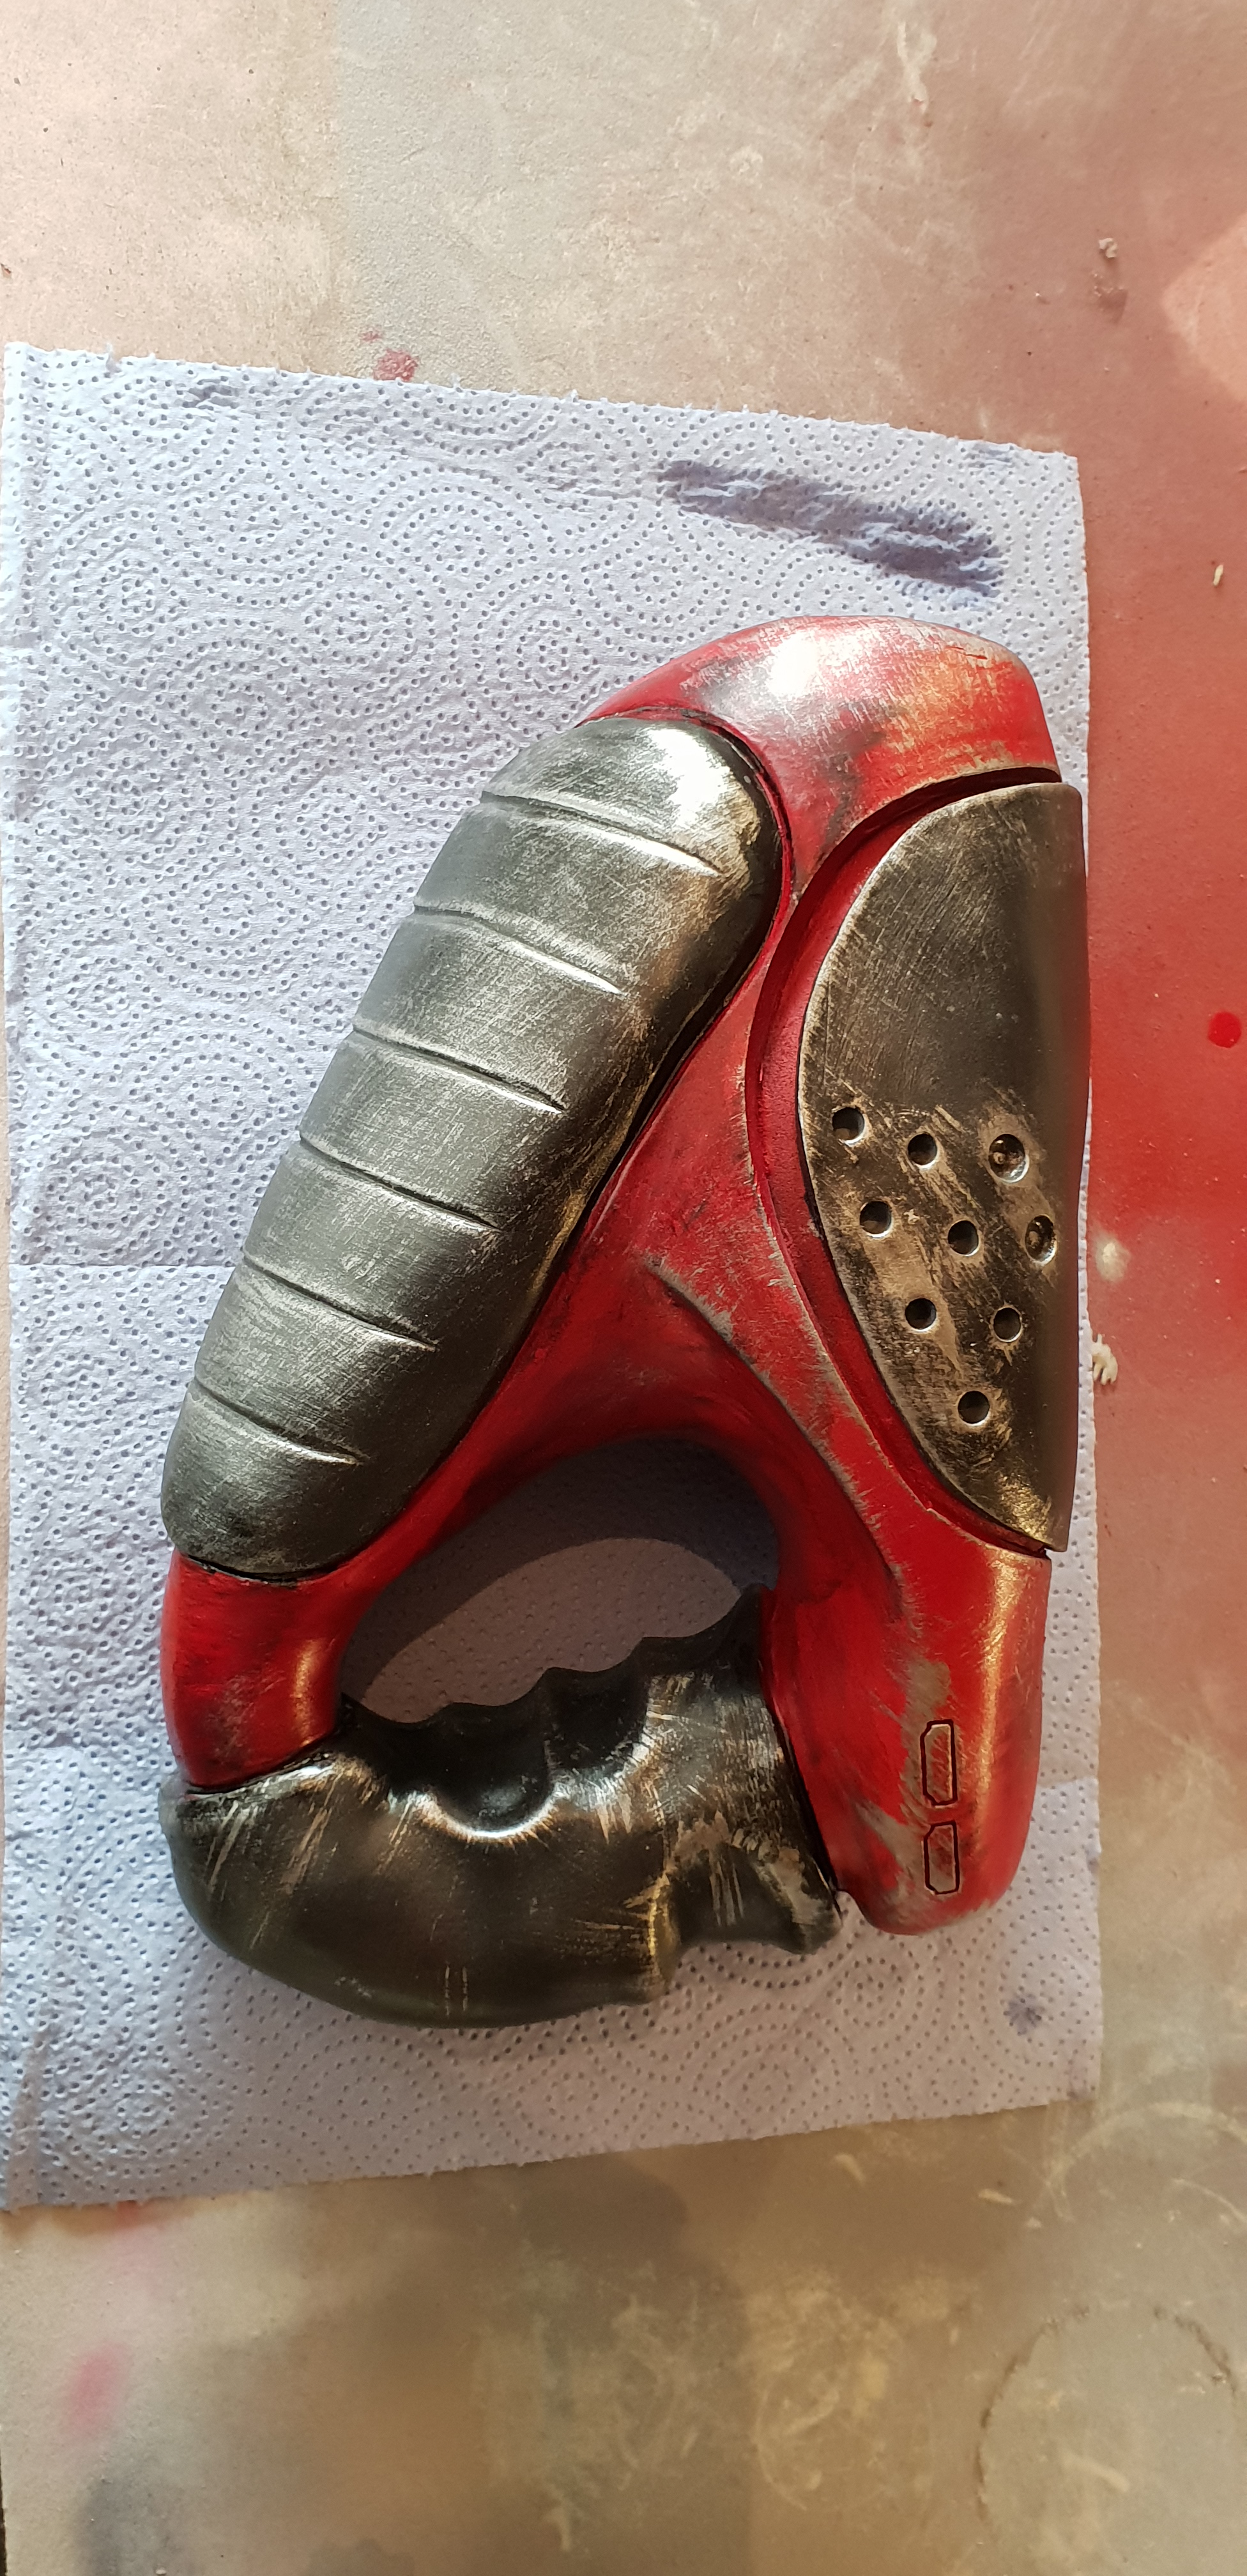
Since I needed to make this piece ‘functional’, I needed to open it up; batteries, lights and wiring needed to be fitted inside, so I cut off the top section with my Dremel. I then primed and painted the piece, to make it look as if it was well-used.

20181204_103519.jpg20181204_103503.jpg20181207_105108.jpg20181207_105116.jpg

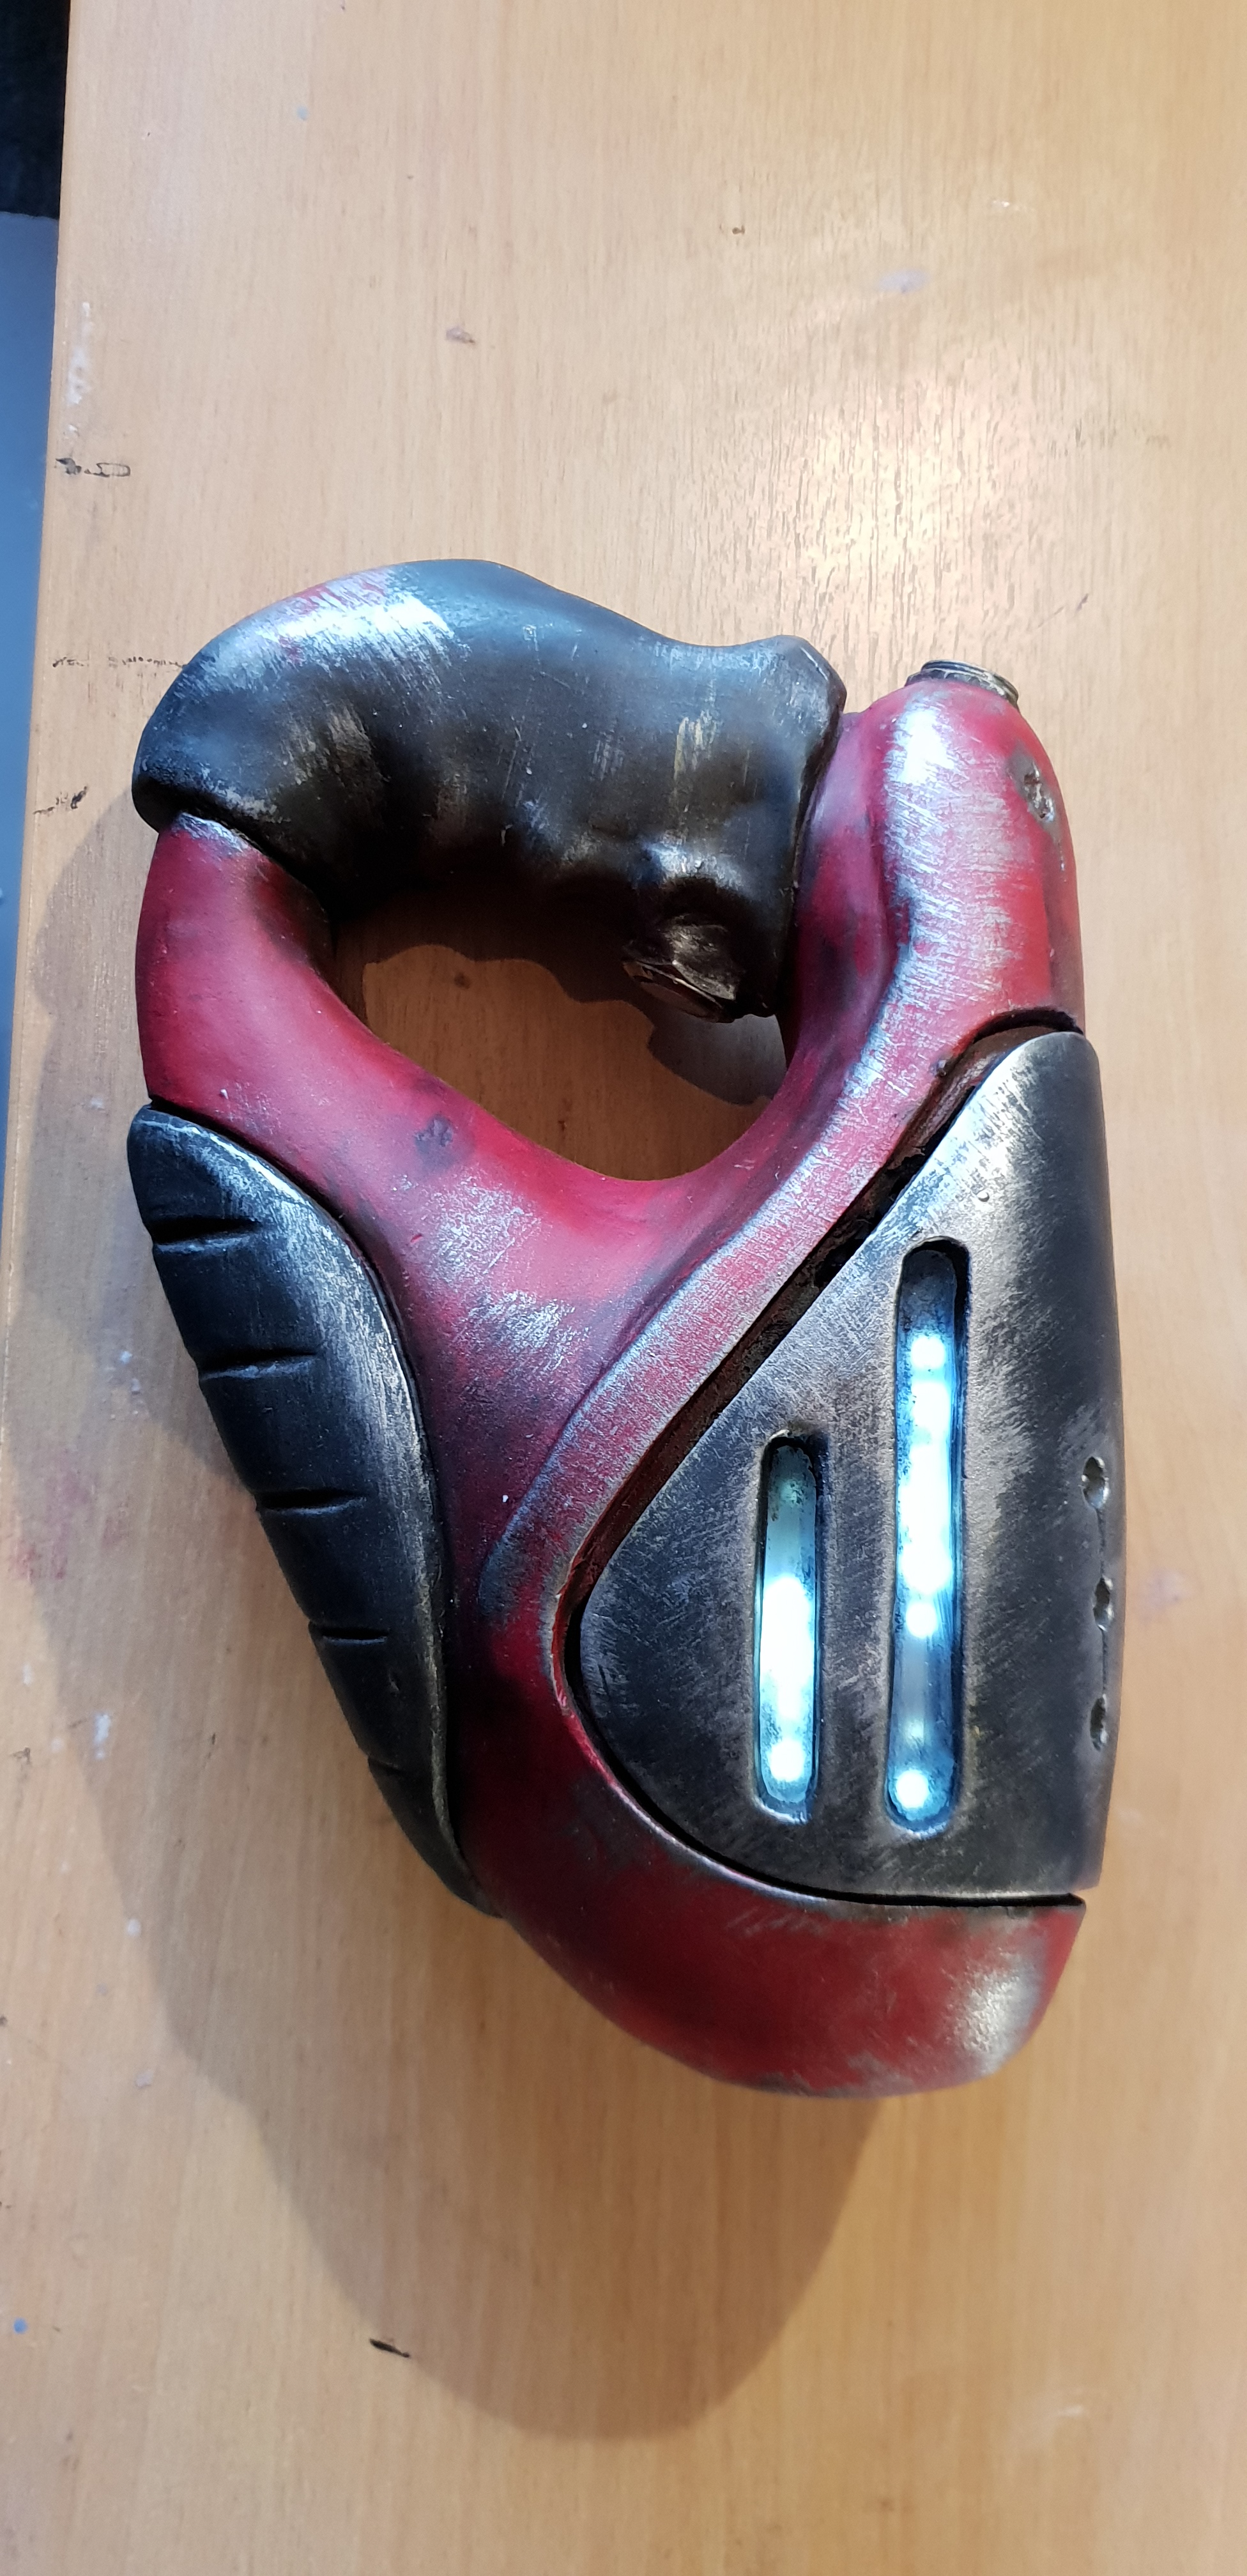
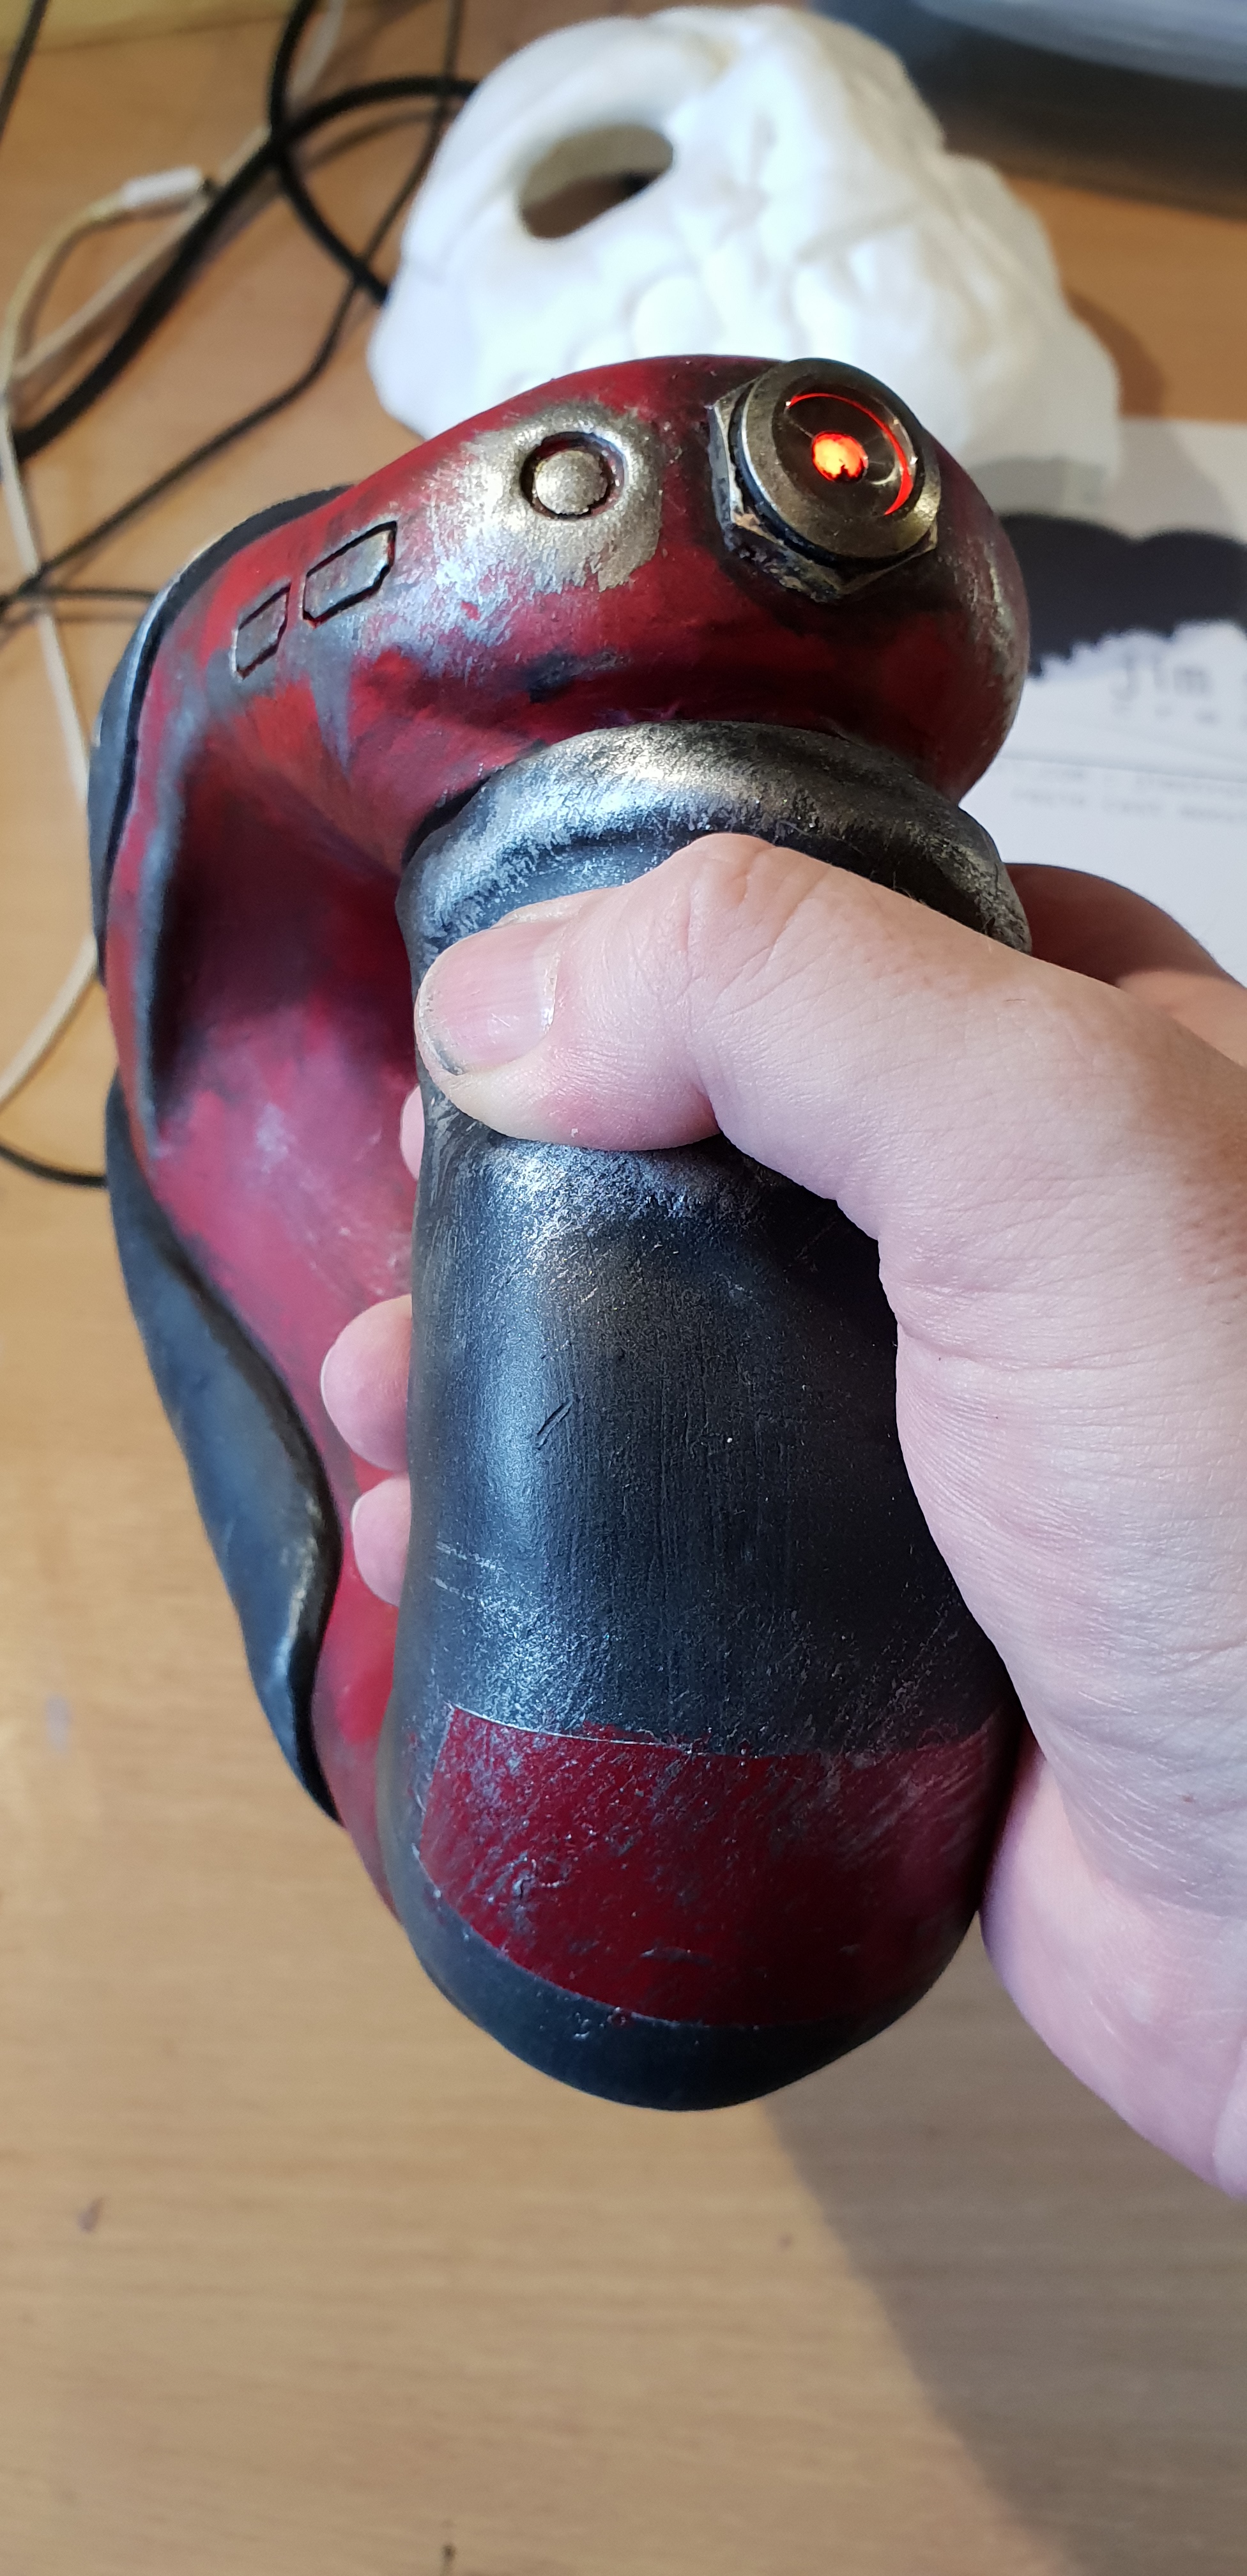
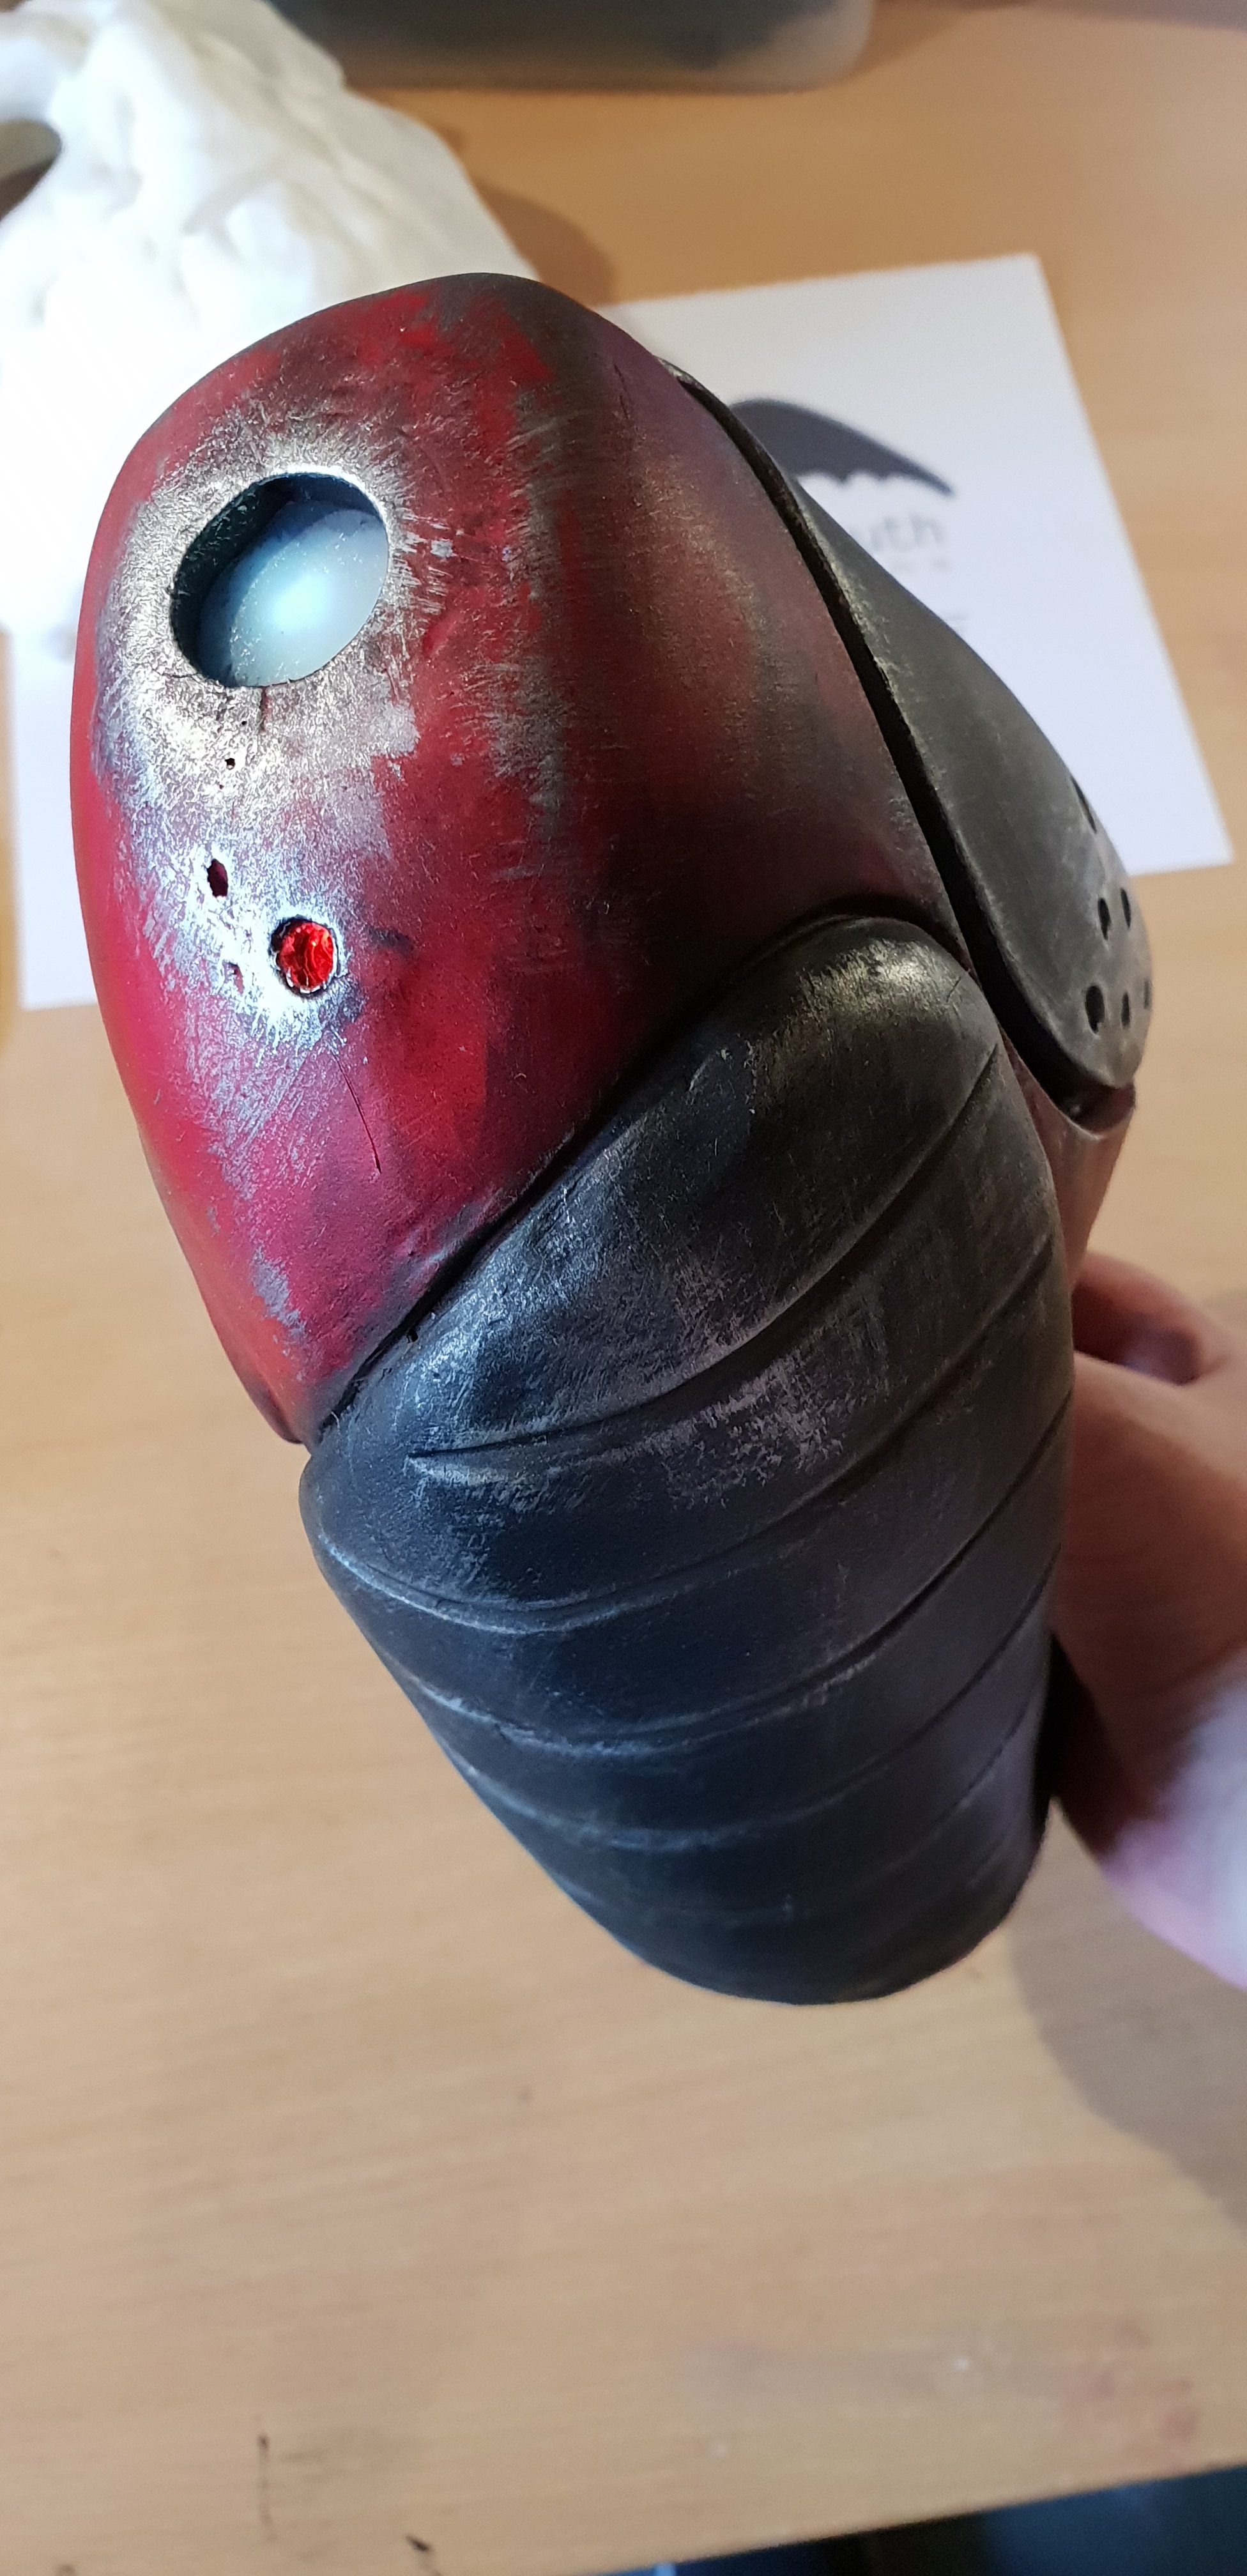
Then came the wiring, and this was the real learning part for me. With help from my partner, I came up with a wiring diagram (which I won’t show you, because I scribbled all over it, and it’s a mess). I drilled out the barrel of the blaster, and the hole I’d marked for the ‘laser’ sight. I bought a couple of LED switches form eBay; a main power switch that would light up and provide power to two strips of LED lights for the sides plus the sight LED, and a moment switch to function as the trigger, which would light up the beam emitter when being fired.

There was a problem, though… the voltage for the LEDs embedded in the switches was 12V, and the other LEDs was 6V. Testing this out with four AA batteries left the switch LEDs a little dimmer than I’d wanted, but I was happy enough to run with things. I then soldered and wired everything up, drilled out the side panels and hot glued some cut pieces of opaque acrylic sheets over them and behind the beam emitter.

Everything was then re-tested before final wiring… the light on the beam emitter isn’t as strong as I’d like it and, thanks to getting too eager, the laser sight is actually slightly off target…. But I’m really happy with the results. Additionally, wiring up the LEDs for the side panels was a nightmare, simply because the connections were 3mmx2mm. This was extremely hard. My hands were shaking just from my heart beating, which I wouldn’t normally notice, but it was apparent at this scale.

The contacts on the strips are arranged in pairs, repeating between each LED. It doesn’t matter which contacts along the strip you solder on to, and in fact you can cut the strips to length. So, when working on the positive contacts, I put bluetac on the negative, and vice versa, to prevent any shorts. I then used hot glue over my soldering to anchor the connections in place; I don’t plan on opening up the blaster very often, but at some point I’ll need to change the batteries, and I need the connections to be physically secure. Because of this, I burned through a couple of the LEDs on the sides strips, making them non-functional. I think it works though. The piece is supposed to be well-used.

It was pointed out to me that there are designers that develop projects to be wired up, and that the process can take a great deal of time and effort. My results, on the surface, are great for cosplay, and I’ll know how to get a better result in the future… but inside things are quite messy, and although it can be used, I wouldn’t give this to a kid to play with. It just won’t stand up to their enthusiastic abuse.

So, here we go. Here’s the final product. 20190115_124552.jpg20190115_124751.jpg20190115_124738.jpgThe pictures don’t quite do the piece justice. It’s far more exciting to look at in real life! That’s partly due to my lack of decent photography skills, and also due to my phone’s camera.

20190115_124606.jpg


Resin Gun Prop Sculpt

Posted in Design, General, scifi, sculpting, Uncategorized, zbrush with tags , , , , , , , on November 8, 2018 by Jim St Ruth
Hey folks!
This is my current piece, which was meant to be a quick project but, as I’ve started it, I’ve realised that there’s a lot I want to do…
The first image is just a couple of renders from the ZBrush concept, which I pulled together in about half an hour. It’s not very detailed, but I just wanted to get the forms and masses worked out.
The second shot is of the core of the actual sculpture.
I printed out the side-shot render from ZBrush, scaling the width of the hand grip to 4cm in Photoshop (that’s the distance between my right index finger and the base of my thumb), to make sure that the prop ends up being the correct scale. I then used some spare modelling foam (dense but very light weight to keep the weight of the sculpt down), traced out the outline of the weapon and cut it out with a craft knife. I then sanded it with my trusty mouse sander to try and get it roughly into shape.
The third shot is my current progress, with Monster Clay added over the foam core and sculpted, then buffed smooth with my *amazingly advanced* tools… which, as you can see in that image, is a small pot of white spirit, a scouring sponge, a hog bristle brush and another very fine brush to get a good polish in the tight spaces where I can’t use the back of the sponge.
The final piece will be moulded and then cast in resin, with LED lights inside and a power switch that will act as the trigger, but…
I need the piece to be hollow, both for weight and so that I can add the lights, wires and batteries inside. To give me reasonable access to the hollow innards, I need to cut the sculpt into two pieces, mould and hollow cast them separately, then slot them together when they’re both complete.
This is taxing my mind-brain.
In my head, I can visualise the structure that I need to do this, which looks like a ‘groove and slot’ arrangement in foam or wood, and I’m planning to use magnets to lock the resin cast pieces securely together.
I don’t want to have to cut it up, though, lol. My anxiety is running at volume 9. I think a hot wire foam cutter should be able to do the job smoothly, as long as I’m careful working along some cut-in seams that I still need to add.
This is a lot of fun. I’ve never sculpted and cast a weapon before, and pushing myself to get a good machined look feels really good. It’s going to look damned fine… I hope 🙂

Grey Head… Done!

Posted in Design, General, science fiction, scifi, sculpting, Uncategorized with tags , , , , , , on June 6, 2018 by Jim St Ruth

He’s finally done!

Sculpted in Monster Claw, then moulded in Platsil Gel 10 with an Easyflo 120 resin mother mould that was thickened with Polyfibre II. Then slush cast in Easyflo 120, primed and airbrushed, with two acrylic spheres for the eyes that have white LEDs hot glued into their backs.

The electrics are comprised of 4xAA batteries in a battery pack, two super bright white LEDs, and a resistor, with the LEDs soldered onto small PCBs.

It’s taken me six months to complete him, but I’ve got a lot of other projects on the go, and so overall it’s only a week’s worth of work, most of which was evenly split between sculpting and moulding. The final piece is also my first full head-sized bust sculpt and cast that I’ve completed, and with some help from my partner, my first lighting project too.

I’m so proud of him.

I think I’ll call him Bob.

Grey Head: WIP

Posted in Design, Fantasy, General, Pictures, science fiction, scifi, sculpting, Tutorials, Uncategorized with tags , , , on March 23, 2018 by Jim St Ruth

A quick update on one of my projects, which is going to be a lamp!

It’s a full-sized bust in Monster Clay, with a clay wall around the base to contain the silicone and resin that I’ll be using to create the mould. I’ll eventually cast it in polyurethane resin, paint it in grey tones, with the eyes formed of acrylic hemispheres that will be filled with Platsil Gel 10. These will then have LEDs mounted behind them, to create glowing eyes!

The eyes have been a bit of an issue for me. I really struggled to work out how to mould and cast them so that I could fill them with silicone to back light.

The options and issues were:

  • Mould over smooth acrylic forms under the sculpt, then cast in resin and drill out the spaces for fresh spheres with a Dremel. This is a really problematic approach, as the eyes tend to be spaces where the resin pools. On a test piece, it took ages to drill out the excess resin, and it was extremely difficult to conserve the eyelids without accidental damage, or ruining the slight interior fold between the eyes lids and the eyeballs. It was also impossible to drill out exactly the right volume for the acrylic hemispheres to then fit inside.
  • Sculpt and mould as above, but then when casting place the acrylic hemispheres in place and pour the resin in around them. This was a nightmare, as although the hemispheres were held in place, it was extremely difficult to slush or paint-cast the resin into the mould without contamination of the hemispheres. Additionally, reaching inside the cast to pour the correct amount of silicone into place was just too tricky.

In the end, I followed so expert advice from the The Moldin’ Years: Rubber and Resin group on Facebook:

  • Sculpt a key onto one of the blank acrylic hemispheres.
  • Mould in silicone and cast in resin, making two copies.
  • Sculpt around these on the main bust.
  • When it comes to moulding, just mould over the whole piece in silicone.
  • Cast silicone copies of the keyed eyes.
  • Insert the fresh silicone keyed eyes into the silicone mould and cast in resin.
  • This should allow me to simply pluck out the silicone eyes from inside the cast, creating empty eye forms that should require very little clean up.

The busts just needs a final polish up… and then it’s onto mouldin’ time!

Decorative Mask in Resin: How To!

Posted in Design, General, Halloween, Masks, sculpting, Uncategorized with tags , , , on October 12, 2017 by Jim St Ruth

I’m really proud of this.

It’s been a work in progress for a couple of months, but I finished the paint job today!

Note: As when using all powders or chemicals that might get onto the skin, in the eyes or lungs, please use adequate precautions! Look at product data safety sheets (easily found on the net) for anything that you use, familiarising yourself with any risks!

Step One – Sculpting

The piece was moulded in Monster Clay on a full-face life cast of my own noggin. The details were then smoothed out with small amounts of white spirit/ mineral spirits using two small, cheap paint brushes; one very course, and the other a fine sable brush, both bought from the 85p paint brush bin at Fred Aldous in Manchester. I made sure not to make the surface too smooth, so that there’s some variation in the fine detail; I wanted it to look a little rough when it was done.
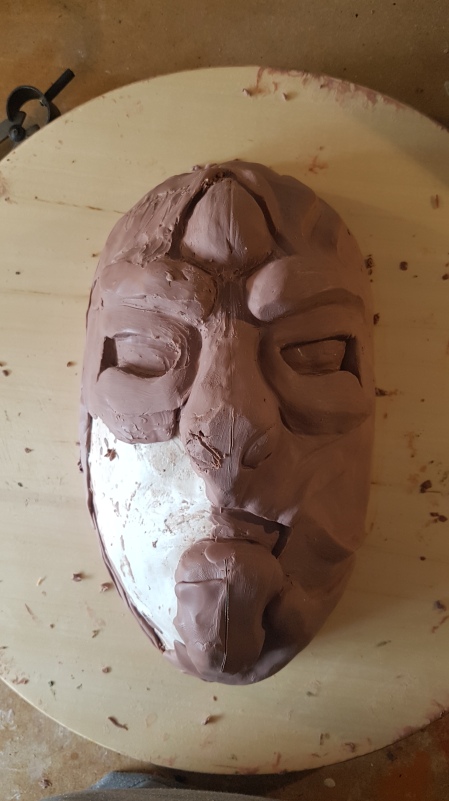
20170718_113153

Partially-sculpted Monster Clay on Plaster of Paris face cast

Note: if you want to get Monster Clay really smooth, then using the end of a dish cloth that’s been dabbed in white spirit can help a great deal, but you might need to make the sculpt pretty smooth first with a sculpting tool, to save you time later on.

Note: If you do this, you’ll need to make sure that the white spirit evaporates before taking the next step. White spirit can, if you use it in any volume, turn Monster Clay to complete mush, and you don’t want the moulding process to ruin any forms or detail. I’ve also no idea if, since the moulding is done in silicone rubber, whether this will prevent curing of the mould. I’ve never had a problem if I leave the white spirit to evaporate.

Note: You’ll need to use white spirit in a well-ventilated area. For me, this is just working with the window open and a fan on. Be cautious. Make sure that you can breathe fresh air!

Step Two – Moulding

I used Tinsil 80-15 to mould the piece, applying a relatively thin detail-capturing layer first. The ’15’ in Tinsil 80-15 relates to its shore hardness, with ‘0’ being the most soft and therefore the most flexible.

Tinsil is very runny, and pretty viscous. Applying in thin layers and letting it cure in between applications means that the rubber won’t just run off all over your work surface (and onto the floor). This method gives you a dome-like mould, which saves rubber too.

Note: You can create a box mould, which means you can just pour the rubber over the piece in one go. This does use more rubber, however, and you can quickly find yourself using a full £35 tin up in one go.

The ‘dome’ method used less than half of that, built up into an overall thickness of around 1.5cm. I left it a full 24 hours to cure, then built up a support jacket make of modroc, to keep the rubber relatively well-held when the final casting took place. This only took around half an hour to be dry.

Step Three- Casting

First, I shook some sintered copper powder into the silicone mould, brushing it around with a cheap make up brush from Poundland. I made sure every bit of the mould’s interior surface was covered, then shaking the rest off back into its bag.

Note: You’ll want to use a decorator’s dust mask for this step, so that you don’t end up breathing in the copper powder.

I used Quickcast resin from Trylon, with a black casting pigment, applied in several layers. The working time was around five minutes on a warm summer’s day in north-west England, and this may vary depending on the temperature and humidity where you live.

Only a small amount of pigment was used, well-stirred into the resin after parts A & B had been mixed. I then just slush cast it into the mould, trying to make sure there were no air bubbles, and that every part of the mould’s interior surface was covered.

This step was then repeated, building up the layers of resin. The final piece is only about 2.5mm thick around the edges, but much thicker around the details of the eyes, chin and nose. This stops it cracking when pulling the piece from the mould. I stopped slushing the resin around when it began to cure, turning into a tar-like substance.

The resin doesn’t take long to cure. It’s a heat-accelerated reaction, so the thickest areas of resin will cure first. It’s strong, but you might find the edges can be brittle. Just de-mould with caution, and you should be fine. I let the piece rest for half an hour after my final layer, just to be sure it ha cured before de-moulding.

Step Four: De-Moulding

Just do this with caution, after removing the plaster support jacket from the silicone. You should be able to just peel the mould off, but be cautious around any sharp or fine edges on the resin; using a low shore hardness rubber for the mould really helps.
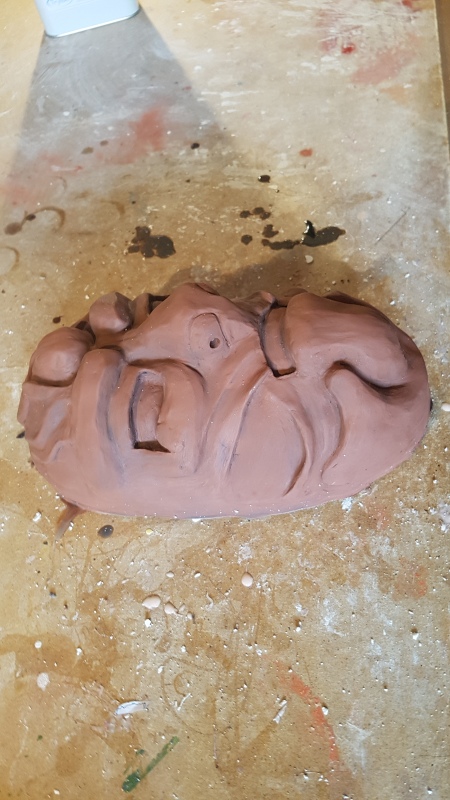
20170725_105423

De-moulded resin cast piece. The sintered copper powder is dull, and looks almost the same as the Monster Clay

Step Five: Buffing

The sintered copper powder is only a thin surface coat to the resin, and looks very dull and non-metallic after de-moulding. I polished the piece with some very fine grade steel wool, being careful not to scratch any of the sintered copper away. This leaves it looking pretty good. Using the back of a metal teaspoon on highlight areas can really help.

I then attempted to polish with Brasso… and this was not a good move. The fine pits and streaks in the mask allowed for the Brasso residue to build up, and no amount of research could give me a good solution for completely removing it. More Brasso just made it worst. With hindsight, I should have just then buffed with the buffing pads of my Dremel and an old sock, but I didn’t…

This did, however, make me go off and think… and that produced the final step: painting!
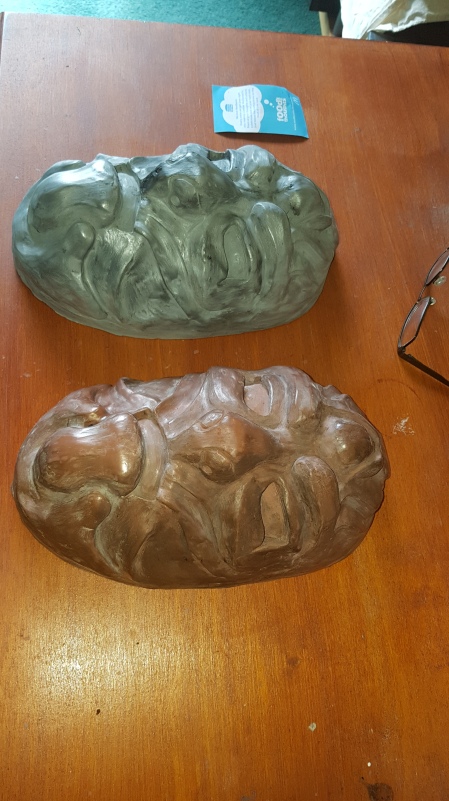
20170805_121243

Buffed-up piece, with an second cast with sintered aluminium for reference. You can clearly see the unwanted Brasso residue.

Step Six: Painting

I bought some metal, Humbrol enamel paints, and some more cheap, wide paint brushes. After mixing the paint in their small tins, I dipped a brush in, wiping off most of the paint onto a clean sheet of paper.

This left a very small amount of paint on the brush, which I then used to paint highlights.

Et voila!
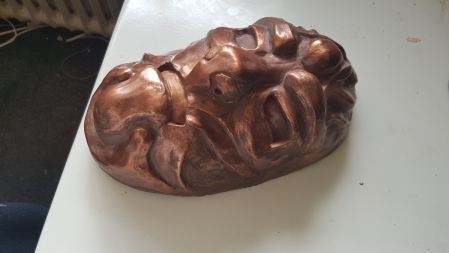
20171012_110604

Final, Painted Piece

Monster Sculpt!

Posted in Design, General, Halloween, Horror, Masks, Pictures, science fiction, Uncategorized with tags , , , , on April 26, 2017 by Jim St Ruth

My latest monster mask sculpt!

As usual, this was sculpted in Monster Clay on a Plaster of Paris life cast of my head.

The ring of clar around the edges of the sculpt is flashing and a wall, behind which I’ll build another wall made of water-based clay, before making the mould with plaster.

The cuts with the short slashes across them will be stitched with string once the mask is cast and painted; they’ll be wound stitches.

I’ve got a little more refining to do, mostly clean up… but I’m happy with this for now.

Note On Final Detail:

To create a subtly bumpy surface, I took a makeup sponge and applied a little white spirit (mineral spirits in the US, I think). Then, dabbing all over the sculpt where I wanted this detail, the clay begins to soften, and I just kept going until the texture was right… and stopped before the clay got outright mushy.

If you try this for the first time, be aware that a makeup sponge can hold a lot of white spirit. It’ll easily run down the model, which might not be a problem… but slight glances with the back of your hand can smear previously-created detail. Caution is the watchword.